Orlogix®'s "Transfer MyPC® Enterprise Edition v11" Microsoft SCCM Guide
The only software that moves a users applications, files, and settings
Now updated for Windows 11!
Orlogix's Transfer MyPC product range is powered by Laplink®
Laplink Copyright / Trademark Notice
Introduction
Transfer MyPC Enterprise Edition can be used in many enterprise automation environments, such as Microsoft's System Center Configuration Manager (SCCM), Ivanti Landesk, Altiris, and PDQ Deploy.
NOTE: This is a scenario with a single SCCM server in a single site, with only a few workstations. Production implementations are always both complex and unique. Planning your testing methodology is critical to avoid impacting other services. For more information on how to implement Transfer MyPC Enterprise Edition in your environment, please contact enterprise.support@orlogix.com.
The goal of this example is to perform a zero-touch Transfer MyPC Enterprise Edition File-Based Transfer export from a source machine using a policy file.
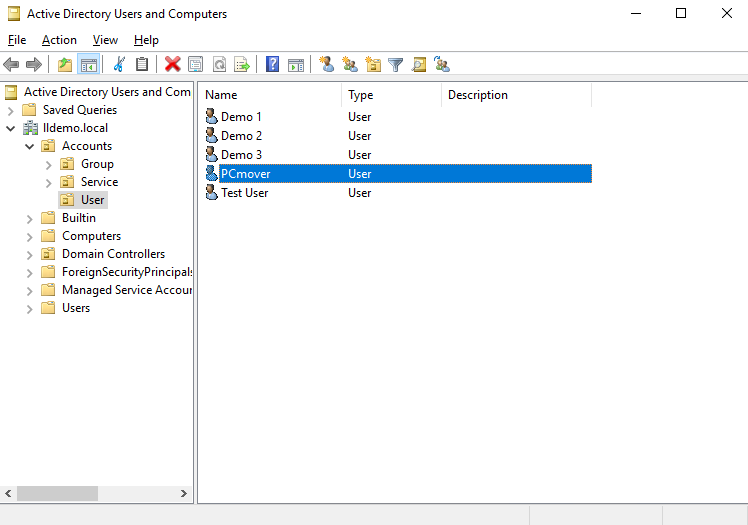
Create Domain a/c
In a traditional on-premises Domain architecture, the account we use to perform the transfer must be a member of Domain Users and must also have Local Administrator access to the machines to be transferred.
While you likely have one or more pre-existing accounts that could serve this purpose (such as the account you use for endpoint software deployment), many of our clients prefer to create a dedicated account to Transfer MyPC to permit separate access control and auditing. We recommend this as a best practice.
When creating this account, you should also consider assigning it an email account. With Transfer MyPC's Email Alert capability (which simply sends an email upon transfer completion with support for environment variables, e.g. "Transfer complete from %COMPUTERNAME%"), this mailbox can be used to monitor migrations, creates an audit trail, and can even be used as a source for external scraping to roll the information up into an Enterprise Project Management system.
Create network share for portable client
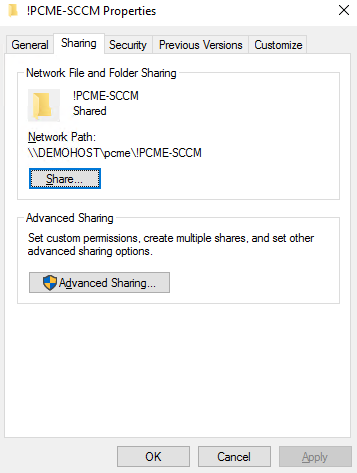
Transfer MyPC Enterprise Edition will run portably by design. For a campus-based automation scenario, install Transfer MyPC from the Setup files on any machine to extract the Transfer MyPC Client files, and then copy the contents of the C:\Program Files (x86)\Orlogix\Transfermypc Client folder to a network file share that will be accessible by the account you created in step Create Domain a/c.
Create network share for transfer data files
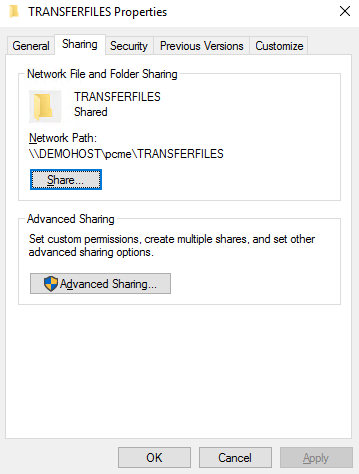
The Transfer MyPC File-Based Transfer workflow is an export-import process. The data exported from the old environment is held in a "Transfer File" that will later be imported into the new environment. In a campus-based automation scenario, this Transfer File will be held on a network file share.
Create Zero-Touch Policy and copy to share
Policy file configuration is beyond the scope of this document. We can provide you with a sample policy and documentation to describe how it is configured, but again we recommend speaking with enterprise.support@orlogix.com first rather than attempting a Zero-Touch configuration on your own.
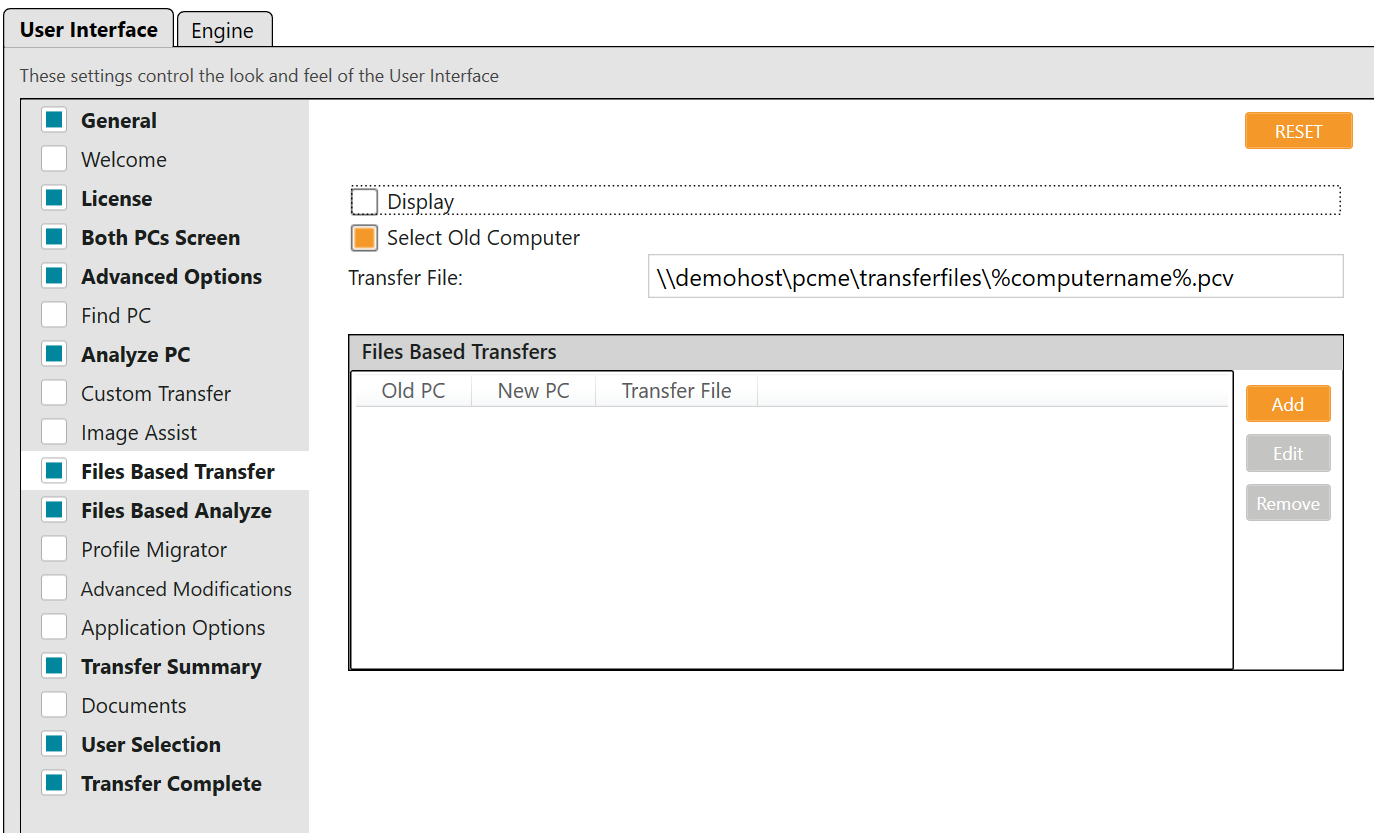
There are several ways to configure this to support your specific scenario, since Transfer MyPC Policies support the use of environment variables to specify both the network location and filename. In this example, we will create the transfer file in a simple network share and name it %computername%.pcv, where ".pcv" is our associated file extension for Transfer Files.
Once your policy is configured, simply place it in the Transfer MyPC network share at the same level as Transfer MyPC.exe, named "policy.pol", and it will run automatically.
Manually test Policy
Before configuring the automation environment, manually login to a test machine and run Transfer MyPC.exe with your Zero-Touch Policy to be sure that it works as expected, i.e.: without user interaction, a PCV transfer file is created in the Transfer Files network share after running Transfer MyPC.exe on the source.
From this point, we are discussing SCCM actions exclusively, but regardless of your automation system, the goal is simply to schedule a time when the source machines will be instructed to run Transfer MyPC.exe from the network share with the zero-touch policy configuration.
Warning: If you run Transfer MyPC simultaneously on a large number of machines without careful planning, you may run into issues such as a saturated network backbone, saturated networking on the file server hosting the Transfer File share, or running out of disk space on that file server.
SCCM
Create Device Collection for source machines
Creating a new Device Collection for your test and populating that Collection with only a few PCs will allow you to test without larger potential impact.
For this simple example, we will create a new Device Collection that explicitly chooses only a single machine.
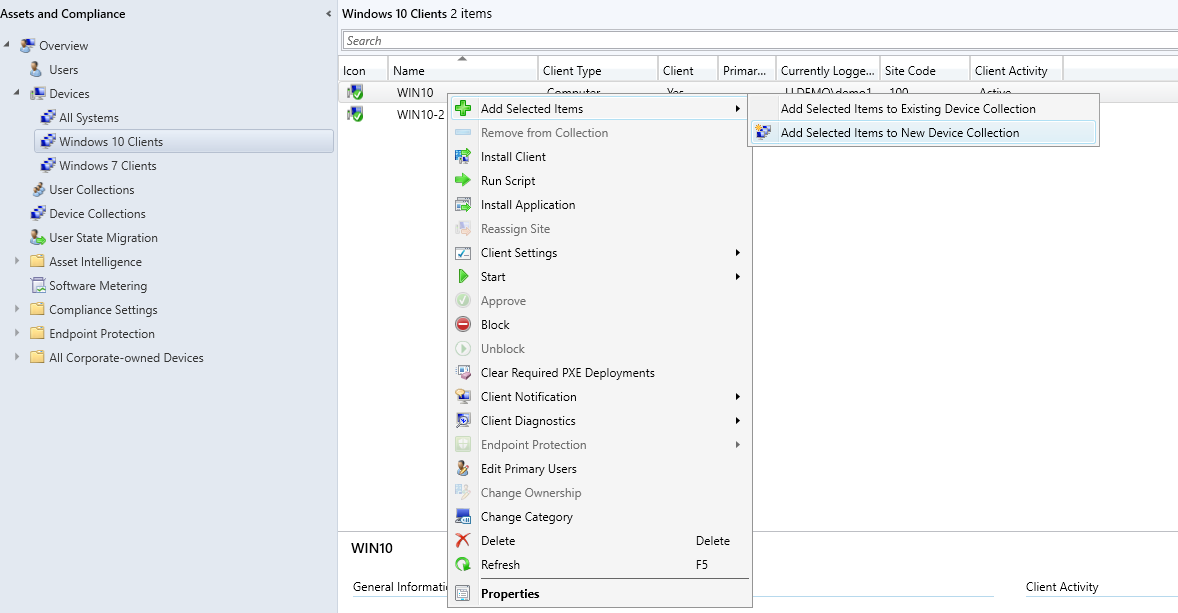
In the Assets and Compliance node, choose a Collection under Devices that contains the machine you will use to test.
Select the machine, right-click, and Add Selected Items to a New Device Collection.
Name the new Device Collection and specify the Limiting Collection.
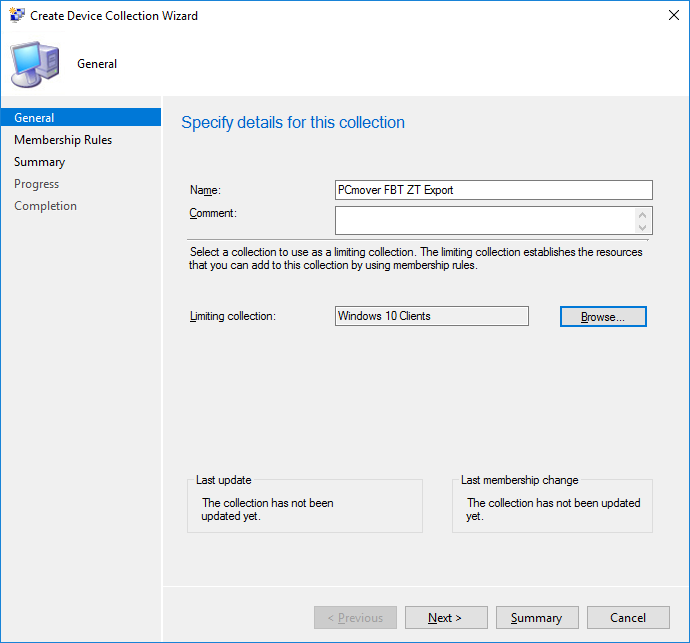
Accept the defaults for Membership Rules and complete the Create Device Collection Wizard. Select your new Collection to verify membership of the test machine.

Repeat this process if you'd like to test multiple machines at the same time, adding each machine to that new Collection
Create Task Sequence
Navigate to Software Library / Operating Systems / Task Sequences / Create Task Sequence
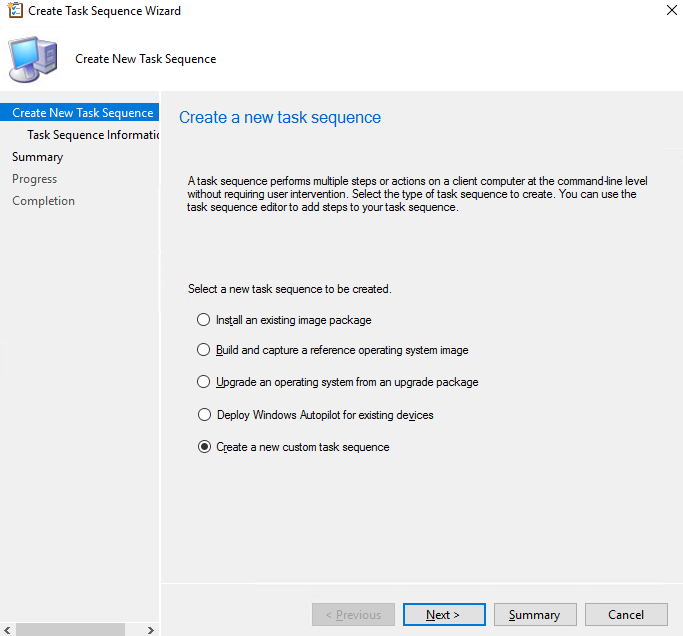
Choose "Create a new custom task sequence," and click Next.
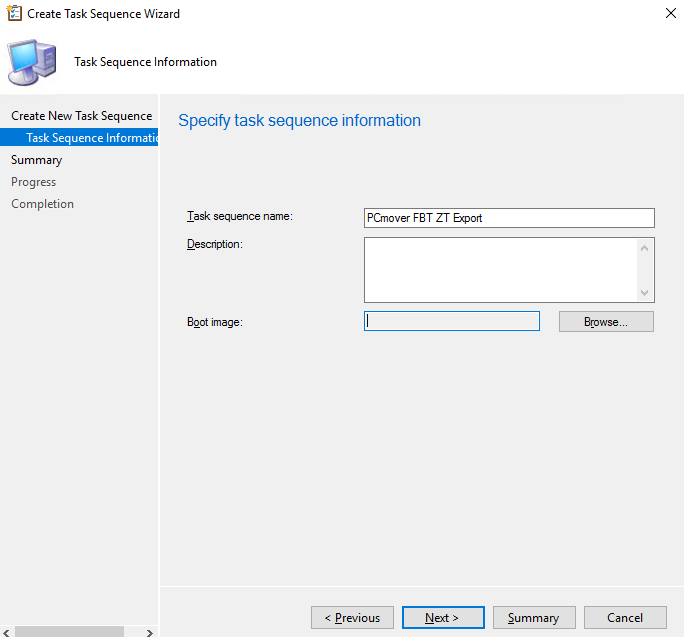
Specify a Task Sequence name and click Next. Click Next again and then Close to complete the Task Sequence Wizard.
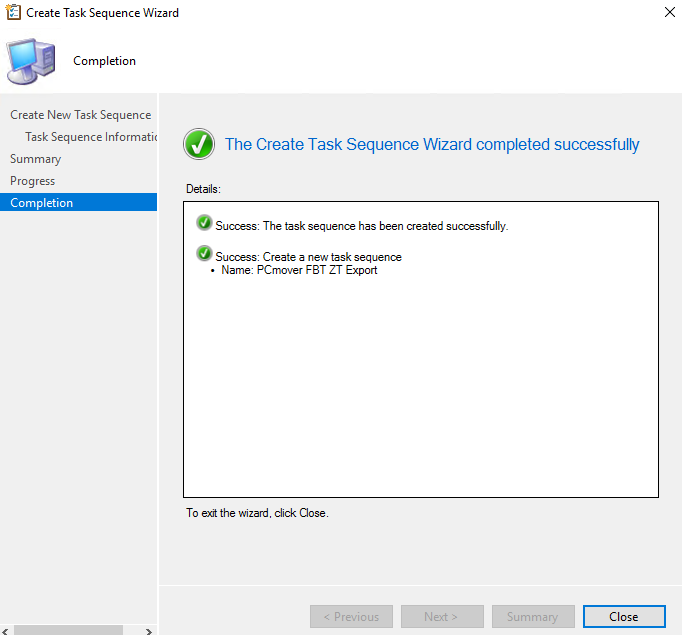
Edit the Task Sequence
Right-click the Task Sequence and choose Edit to open the Task Sequence Editor.
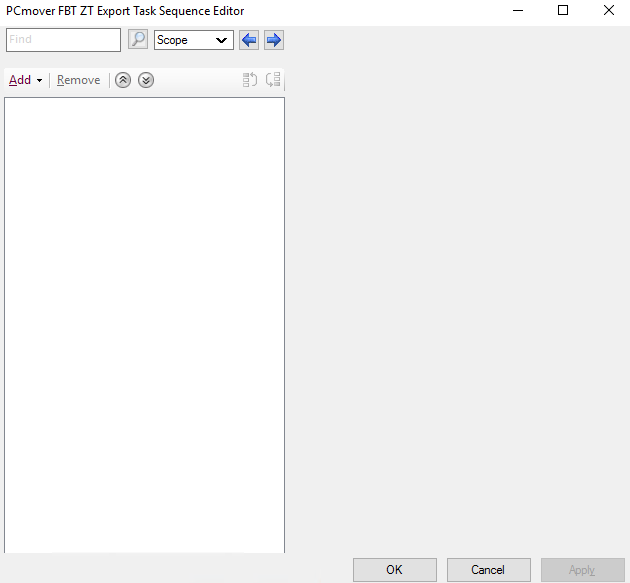
Click Add / General / Run Command Line.
Specify a Name and optional Description.
Specify the command line: cmd /c "\\demohost\pcme\!PCME-SCCM\Transfer MyPC Client\Transfer MyPC.exe"
IMPORTANT: Substitute your network path to Transfer MyPC.exe
IMPORTANT: You MUST encapsulate Transfer MyPC in a new command processor (cmd /c) or it will not launch.
Check the "Disable 64-bit file system redirection" box
Check the "Run this step as the following account" box and specify the account that you will use to perform the transfer (see Step 1)
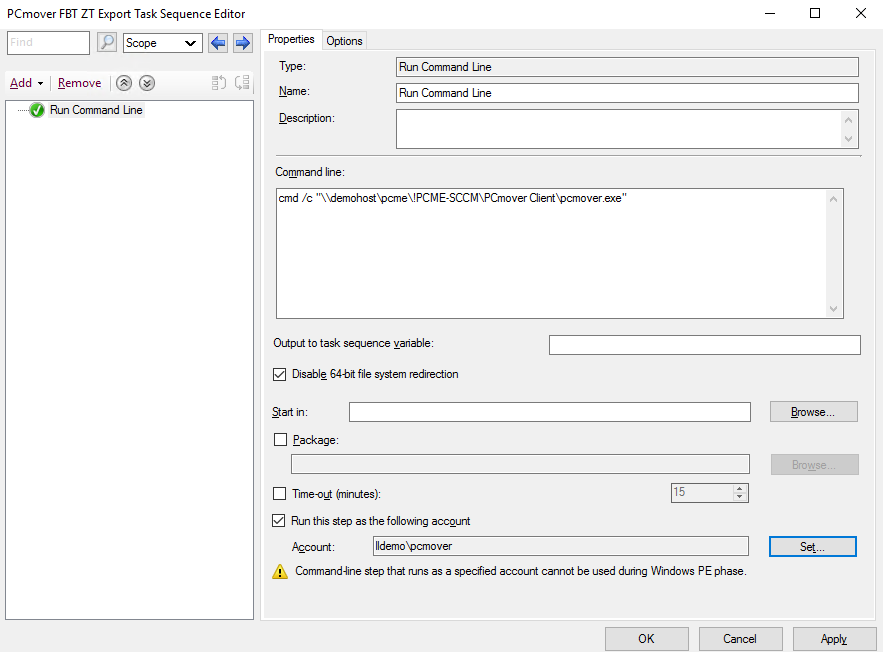
Click OK
Deploy the Task Sequence
Right-click the new Task Sequence and choose Deploy.
Specify the Device Collection you defined in Step 6 and click OK. Then, click Next on the Deploy Software Wizard.
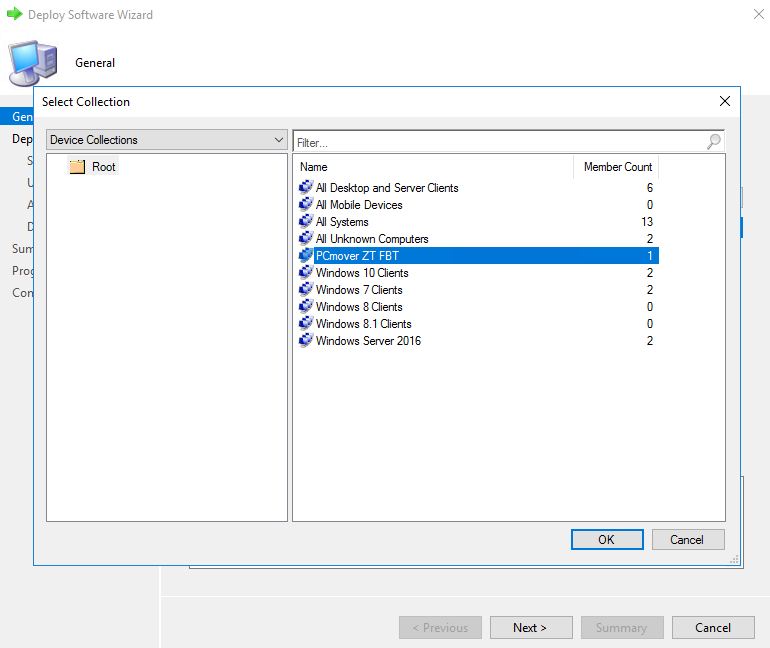
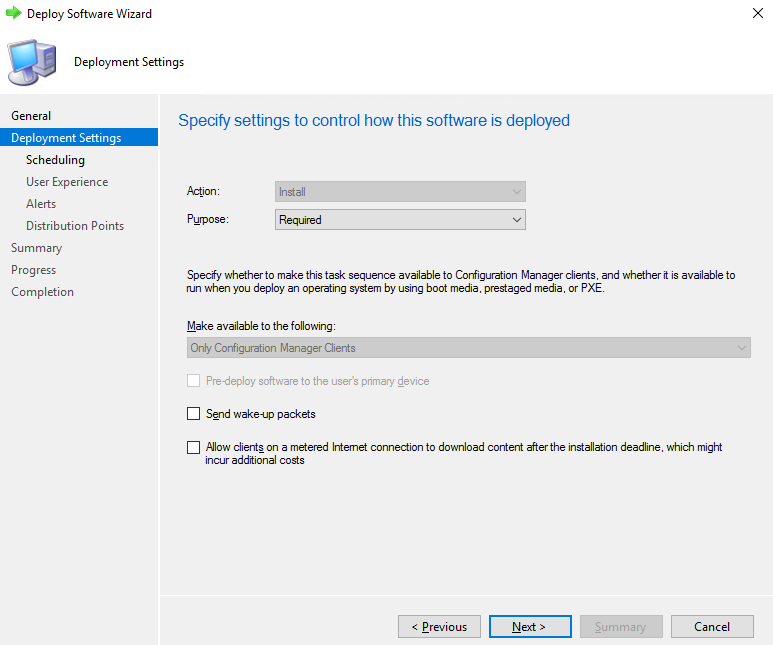
Change Purpose from the default "Available" to "Required" and click Next.
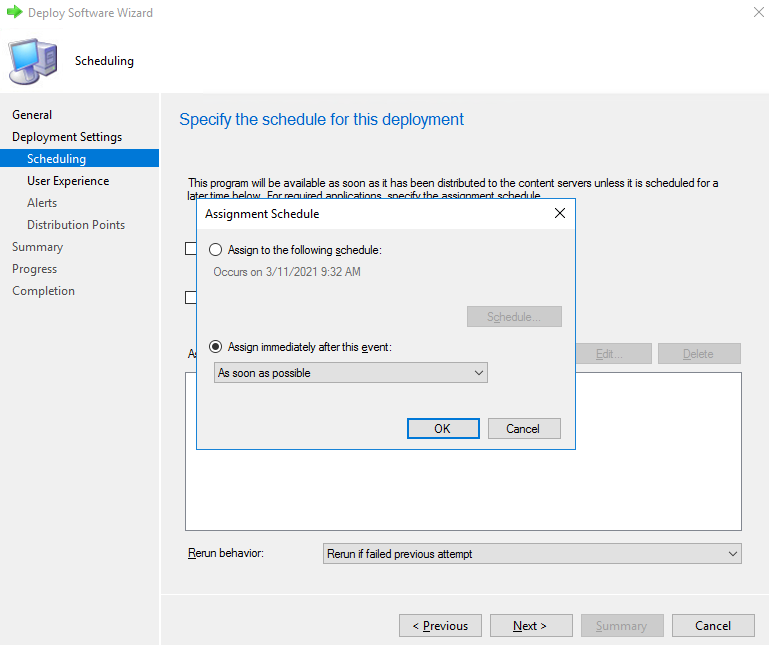
Click the "New" Assignment Schedule button, select the "Assign immediately after this event" button, choose "As soon as possible," and click OK.
NOTE: For testing purposes, this will cause the Source PC to perform the action right away. In a production deployment, you would create multiple schedules to cascade deployments given your available network bandwidth, file server performance, etc.
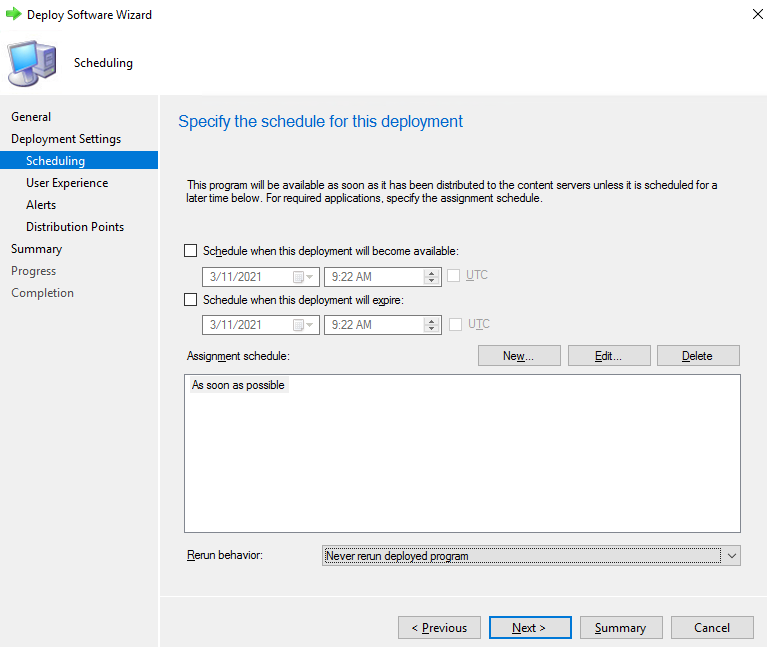
Select the "Rerun behavior" dropdown. Choose "Never rerun deployed program" and click Next.
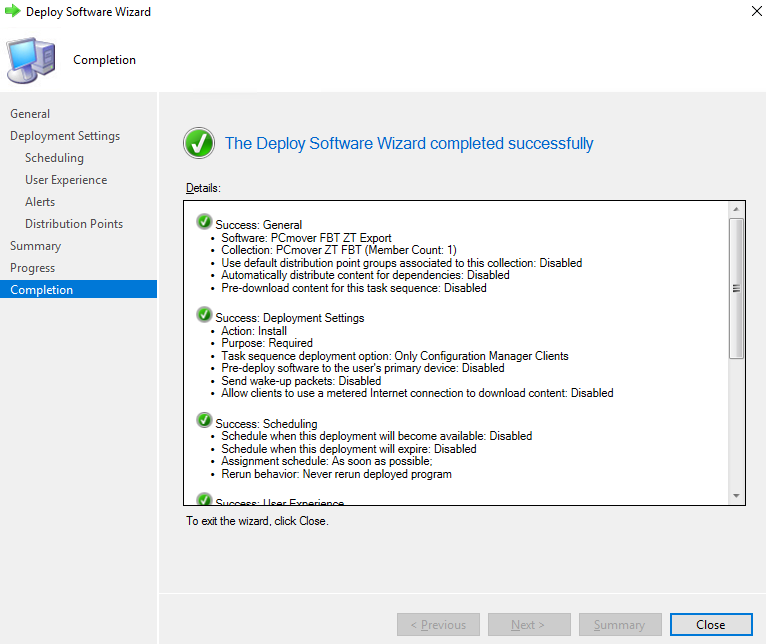
Accept the defaults for the rest of the screens, clicking Close when the wizard completes successfully.
Force the Task Sequence to run
At this point, if you wish, you can simply wait for the client Application Deployments Evaluation to complete automatically. If you want to force the deployment to occur more quickly, choose the Assets and Compliance node, right-click your Transfer MyPC device collection under Devices, and choose Client Notification / Evaluate Application Deployments.
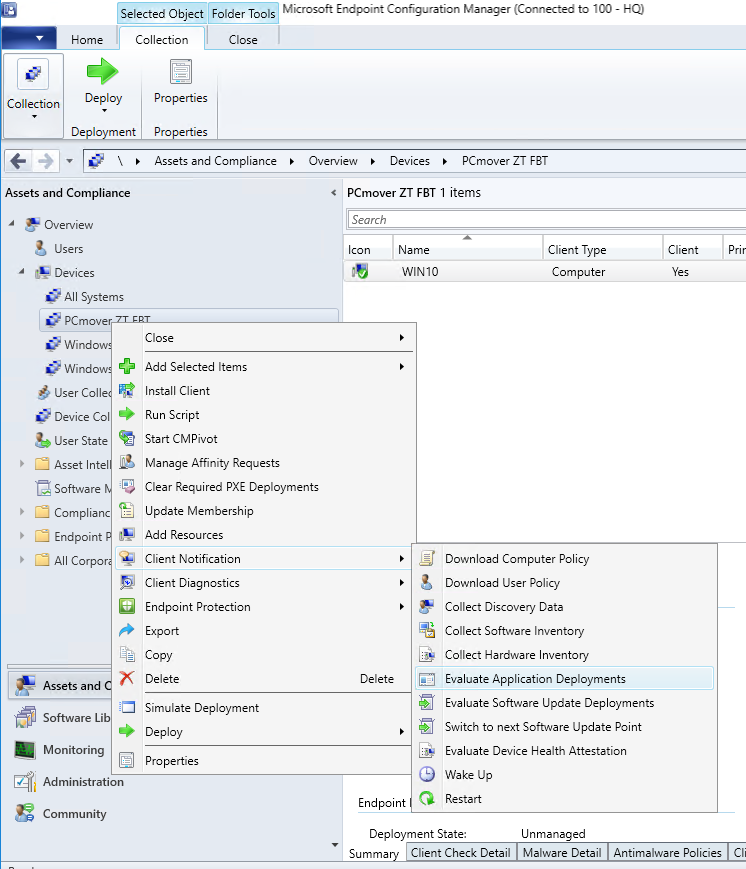
Watch the network folder that you created to hold the Transfer Files. If configured properly, once the evaluation cycle occurs and Transfer MyPC's Analysis completes, you should see the Transfer file appear as "In Progress" and then rename automatically to its final name when complete. Note again that in this example we have specified %computername%.pcv in the Transfer MyPC Policy configuration.

Re-run the test
If you want to re-run the same test in this configuration, you will need to create and deploy a new Task Sequence. This is easily done by simply copying the existing Task Sequence. This will create a new package with a different Package ID.
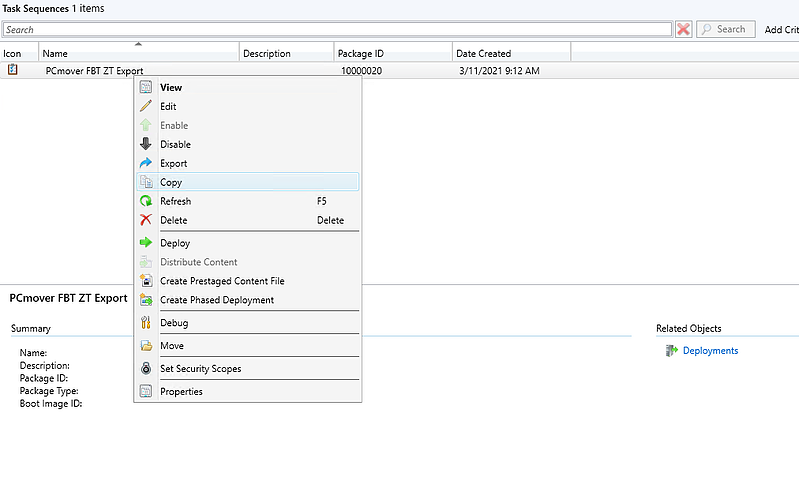
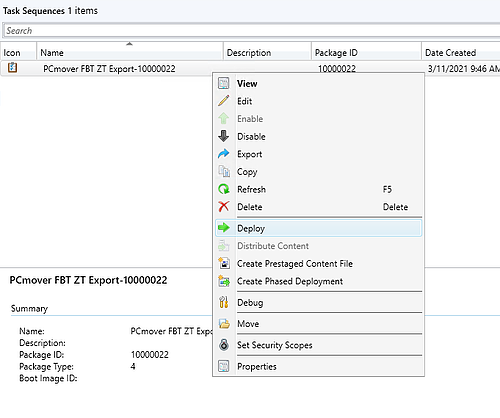
Then delete the original task sequence and deploy the new one with the same actions listed in Step 9.
Conclusion
Transfer MyPC Enterprise Policies offer you granular control over Transfer MyPC behavior, including which, if any, steps of the GUI should or should not be shown to create a zero-touch experience that is suitable for integration with any management system that offers remote-launch and scheduling.
This simple example, of a zero-touch automated export using the Transfer MyPC File-Based Transfer workflow, is the most common automation scenario we see. Other types of scenarios may introduce complexities beyond what we can cover in a simple tutorial like this, so we highly encourage you to book time with one of our Enterprise Architects or contact us before attempting to deploy such a configuration in your environment.
Technical Support
Enterprise Support
Unlimited free email support from enterprise.support@orlogix.com
Email support is only availble in English.
Consumer and Business Support
Unlimited free email support from support@orlogix.com
Unlimited free phone support from
European Freephone : 00800 3883 2000
ROI number : +353 61 226 935
Times of Operation
Monday - Friday
(Republic of Ireland public holidays excepted)
Please note that we are also closed on Dec 24th
08:00 - 13:00 open
13:00 - 14:00 closed
14:00 - 16:00 open
14:00 - 15:00 open(Fridays only)
Republic of Ireland Time Zones used
During "Irish Winter Time"
from last Sunday in Oct to last Sunday in Mar
WET/GMT (UTC+0)
and
During "Irish Standard Time"
WEST/BST/IST (UTC+1)
Email and Telephone support is available in English, German, French, Italian and Spanish.
Customer Feedback
We welcome all feedback to john@orlogix.com