Orlogix®'s "Transfer MyPC® Enterprise Edition v11" "User Client" Guide
The only software that moves a users applications, files, and settings
Now updated for Windows 11!
Orlogix's Transfer MyPC product range is powered by Laplink®
Laplink Copyright / Trademark Notice
Orlogix's "Transfer MyPC Enterprise Edition" is an automated Windows OS user-environment migration tool capable of transferring installed applications, user profiles, files and settings to a user's new physical or virtual personal computer.
Transferring a Windows PC or Notebook across any TCP/IP LAN, Laplink Transfer Cables, any standard Ethernet crossover cable, or using file storage media such as optical discs, USB drives or file servers can be as simple as a single click. Computers with multiple users have the option to transfer some or all the users at once, with security information about file ownership and access control preserved for each user.
Note: This user guide provides instructions on using the Transfer MyPC Enterprise Edition Client to perform a transfer.
By using policy files with Transfer MyPC Enterprise Edition, you can completely customize the transfer experience by choosing which screens (if any) you want shown during the transfer and configuring other settings.
Before running the "User Client" application, a suitable policy file should be configured and saved. Policy files can be configured and saved using the included "Policy Manager" graphical interface. Policy files are encrypted XML files and cannot be created manually.
Common solutions
- Migration from an "Old PC" to a "New PC" via wired/wifi connection.
- Migration to or from a virtual machine.
- Migration from an "Old PC" to a "New PC" via file storage.
- Windows Upgrade: Upgrade the OS on a PC to a newer OS such as Windows 11.
- Broken "OLD PC": Transfer from an hard-drive image file or physical hard-drive.
- User Management: Transfer Windows user profiles on the same Windows OS.
Note: A standard Transfer MyPC Enterprise Edition transfer moves a copy of all of the selected files, settings, and programs from the "Old PC" to the "New PC". Nothing is overwritten on the "New PC", and the contents of the "Old PC" will remain unchanged after the transfer.
Glossary
- "Old PC"/Source PC
- The source PC is the "old" user environment that contains the applications, files, and settings that you wish to move to the destination, or "new" PC. The source can be a physical desktop or notebook, a virtual PC, a drive image or a bare physical hard drive.
- "New PC"/Destination PC
- The "new" PC is the user environment to which the applications, files, and settings are moved. Only transfer to physical or virtual PCs is supported. You cannot migrate to a drive image or a bare physical hard drive.
- Transfer
- The process of copying all the selected applications, files, and settings from the "Old PC" to the "New PC". Note that this process is very careful to not over-write any existing data on the "New PC" or equally to delete any data on the "Old PC".
- Serial Number
- This is the developers term for the code they provide after purchase of one or more licences. A single serial number can indicate any number of usable license activations from zero to many 1000's. You will be required to input the serial number at some point to activate the purchased license and be permitted to use the product. Another commonly used term for this is "license code". Note that the "serial number" is in no way related to any hardware you purchase. You will not see it on a label stuck to your hardware by an OEM such as Dell.
License
- License
- A license is legal permission to use the product under certain circumstances. A license is "activated" to use the product and is thus consumed and cannot be used with a different pair of "Old" and "New" PCs.
Pre-Installation Checklist (both PCs)
System requirements for each PC
- CPU
- Same as required by installed Windows OS
- RAM
- Same as required by installed Windows OS.
- Available hard-drive space
- 300 MB.
- Microsoft OS
- Windows 11/10/8.1/8/7/Vista. Both 32 and 64 editions are supported. Transfer from 64 to 32 bit is not supported.
- Windows XP is supported as a source only and may require a slightly different transfer procedure.
Note: Transfer MyPC Enterprise Edition does not support full server restorations, such as is found on Windows Server Editions. It will execute on these operating systems and can be used to restore accounts and locally installed applications. However, it will not properly restore any of the system's services and settings such as the Domain Name Service, SQL Server, Exchange, IIS, or Terminal Licensing.
- The operating system on the "New PC" must be the same as or newer than the operating system on the "Old PC".
- All Windows Important Updates must be applied to the "New PC".
- If using a cable to transfer, do not plug it in until directed to do so later in this user guide.
Installing Transfer MyPC Enterprise Edition
To install Transfer MyPC Enterprise Edition from a downloaded file, follow these steps on each PC:
- Double-click on the Transfer MyPC Enterprise Edition setup file in the folder where the file was saved.
-
To run Transfer MyPC Enterprise Edition from a portable or remote location, choose one of these two options:
- Install the application directly to the portable or remote location. During installation, change the default install location to the desired location.
-
Install the application locally and copy to the portable or remote location. After confirming installation is complete, copy and paste the entire "Transfer MyPC" directory to the portable or remote location it will be run from (such as a USB flash drive, network drive or shared folder).
Note: When Transfer MyPC Enterprise Edition is installed locally, the default location of the Transfer MyPC Enterprise Edition Directory is:
C:\Program Files (x86)\Transfer MyPC\
Once the "Transfer MyPC" directory is in the portable/remote location, navigate to the "Transfer MyPC Client" folder in that location and double-click PCmover.exe to launch the application. If you want a user to run Transfer MyPC Enterprise Edition from a remote location, you can send the user a direct link to PCmover.exe.
Pre-Transfer Checklist (both PCs)
The following items should be addressed and/or completed on both of the PCs before starting Transfer MyPC Enterprise Edition.
- Transfer MyPC Enterprise Edition Installation
- Transfer MyPC Enterprise Edition has been installed on both PCs, or is installed to a folder with read/write access (i.e., USB flash drive, file-share, etc.).
- Administrator-level Permissions
- On some operating systems, you will need Administrator-level permissions to perform a transfer.
- Network Domain PCs
- Microsoft Windows Domain User accounts should be connected and logged into the domain at least once prior to the transfer.
- Hard Disk Space ("Old PC" relative to "New PC")
- The hard drive(s) on the new computer should have sufficient free drive space for the amount of data being transferred.
- Windows Versions ("Old PC" relative to "New PC")
- The "New PC" must have the same Windows version or newer Windows version compared to that installed on the "Old PC".
- Computer Cleanup and Backup
- Orlogix recommends using anti-virus/anti-spyware and a PC backup or imaging utility on the "Old PC" prior to attempting the transfer.
- PC Power Settings/Options
- Screensavers, hibernation protocols, and power-saving options on both PCs should be turned OFF (i.e. All power management options in the Control Panel should be set to "Never" so they are completely disabled). Both PCs need to remain on and completely "awake" during the transfer and must not go into screensaver or sleep/hibernation mode. A notebook PC must be plugged into a power outlet, rather than running on its batteries, as the transfer is likely to take a longer time than the battery life.
- Exit All Programs
- Exit all programs that are running on both PCs. Turn off system tools such as virus scanners, spyware scanners, firewall software, and desktop search utilities on both PCs. Due to the nature of these types of applications, you should choose not to transfer them, as they are unlikely to transfer correctly.
Ready to Start
If Transfer MyPC Enterprise Edition is not already running, start it on BOTH PCs".
Upon starting you will briefly seeing the following splash screen ...
... then you will typically see the folowing Microsoft Windows "User Account Control" screen over a greyed out screen.
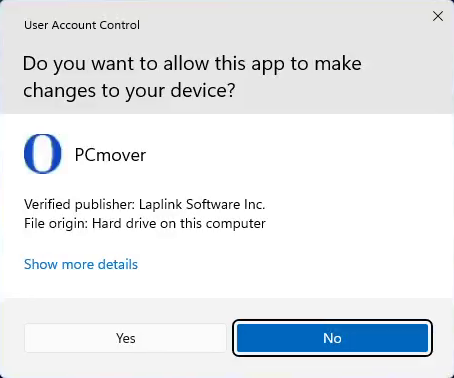
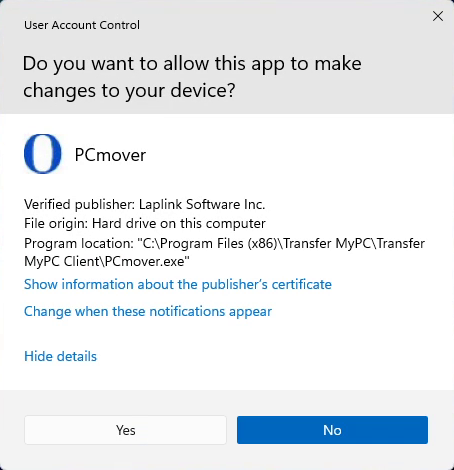
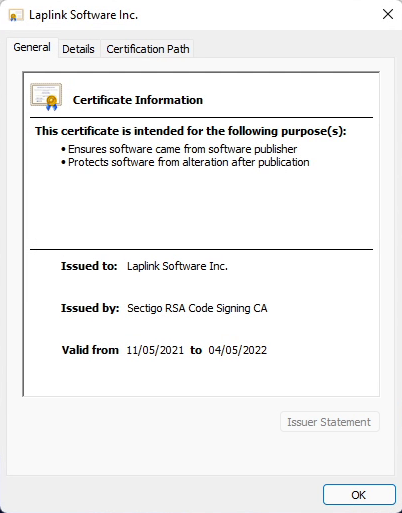
This is a standard Microsoft security precaution. Note that the app has a verified publisher (Laplink Software Inc.) If you click "Show more details" and "Show information about the publishers certificate" you will see the following screens.
Click "Yes" to proceed with starting Transfer MyPC Enterprise Edition.
Note: The following instructions and screenshots reflect a Transfer MyPC Enterprise Edition transfer in which every screen and every option is shown to the user. If changes have been made to the policy file to customize the transfer, the transfer experience may not include some or all of the following screens and/or options.
Once Transfer MyPC Enterprise Edition is running you must perform the steps
before seeing Run Transfer MyPC on Both PCs - Plug in cable on BOTH PCs.
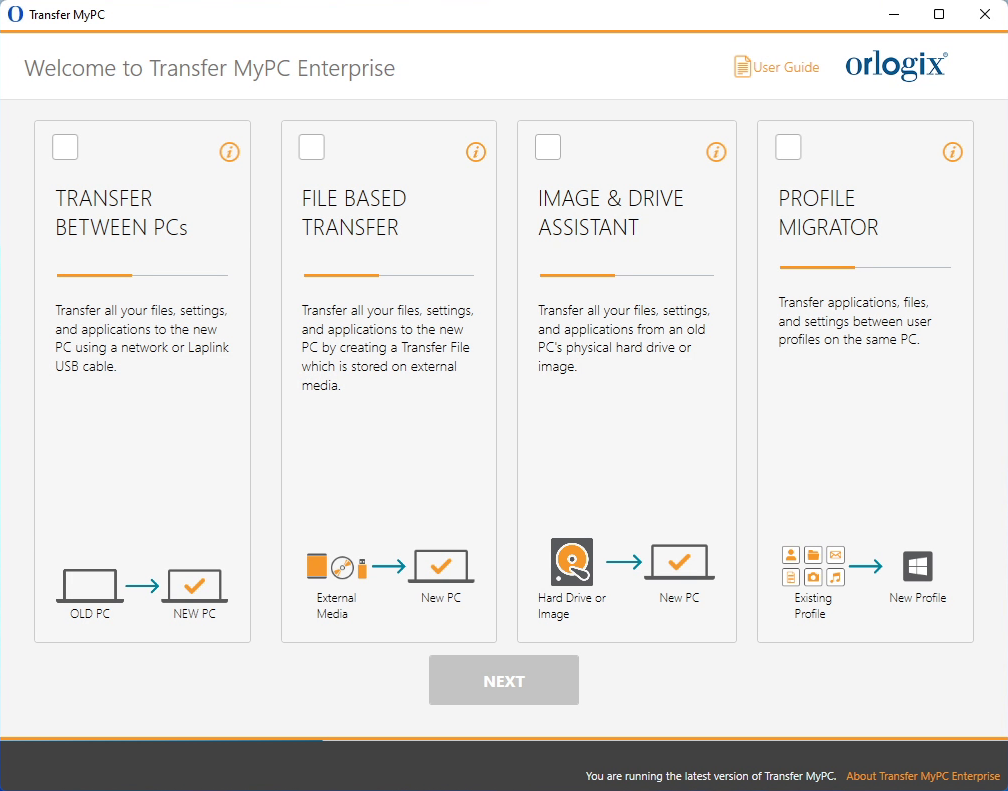
Welcome to Transfer MyPC Enterprise - Choose your transfer scenario
 Note: If the Next button stays gray and you see an error, please use this support solution.
Transfer Scenarios - Overview
Note: This guide focuses on the "Transfer Between PCs" scenario. For the other choices the screens you see and the order they are shown in will be different.
Transfer Between PCs
This is a live transfer scenario where both PC's are booted up and connected via a wired or wireless connection. The connection can be any TCP/IP network with both on the same subnet, any standard Ethernet crossover cable or one of the Laplink USB or Thunderbolt direct cable connections. The data is gathered from the "OLD PC", streamed across the network connection and integrated into the "New PC" in a single operation. The transfer can be fully customized using a policy file allowing a range of experience from zero-touch to full GUI Wizard control by the end user.
File Based Transfer
This scenario is a delayed two-step process where the data is first gathered from the "Old PC" into a file. The file can then be loaded into the "New PC" at a later time to complete the transfer. The media must be accessible via the Windows file system. The file can be stored on any media of sufficient space and bandwidth. (ie very small media such as a plain CDR or very slow such as cloud storage over a slow connection may cause issues). This is a very common scenario for IT automation using tools such as Microsoft's Endpoint Configuration Manager(MECM) or System Center Configuration Manager(SCCM) and LAN based file servers as the storage media.
-
Brief overview of process
- Click "File Based Transfer" on the "Welcome" screen and click "Next".
- Follow the on-screen prompts to create the Transfer File and save it to external media.
- To customize what is transferred from the "Old PC", such as selecting applications, user accounts, and drives, click Customize Transfer File. See the Choose What to Transfer and Let me Choose(aka Transfer Summary) steps in this guide for more details on what you can select.
- When prompted, start Transfer MyPC Enterprise Edition on the "New PC". Follow the screens to unload the Transfer File on the "New PC" and complete the transfer.
Image and Drive Assistant
This scenario allows transfer from an "OLD PC" OS that is not booted up but is not damaged and is available either as a partition on a physical hard-drive or an image file of such. If used, the physical hard-drive must be physically connected to the "New PC" using standard connections as appropriate. If used, the image file must be accessible to the filesystem of the "New PC".
NOTE: This is NOT a repair or rescue tool. The hard-drive or image must be 'healthy' enough for all suitable data to be found and copied from it.
-
Brief overview of process
- Prior to using Transfer MyPC Enterprise Edition, mount the disk image of the old computer or connect the hard drive directly to the "New PC".
- Click Image and Drive Assistant on the Welcome screen and click Next.
- Follow the on-screen prompts to set up the restore.
- To customize what is restored from the disk image or hard drive, such as selecting applications, user accounts, and drives, click Choose What to Transfer. See the Choose What to Transfer and Let me Choose(aka Transfer Summary) steps in this guide for more details on what you can select.
- Continue following the wizard screens to complete the restore.
Profile Migrator
Transfer files, settings, and user-specific applications between two user profiles on the same PC. Transfer MyPC Enterprise Edition supports transfers for Azure Active Directory users, local Active Directory users, and local non-domain users.
-
Brief overview of process
- Click Profile Migrator on the Welcome screen and click Next.
- Follow the on-screen prompts to set up the transfer between user profiles.
- Additionally, please see the Transfer MyPC Enterprise Edition Profile Migrator User Guide for step-by-step instructions.
Validate Serial Number
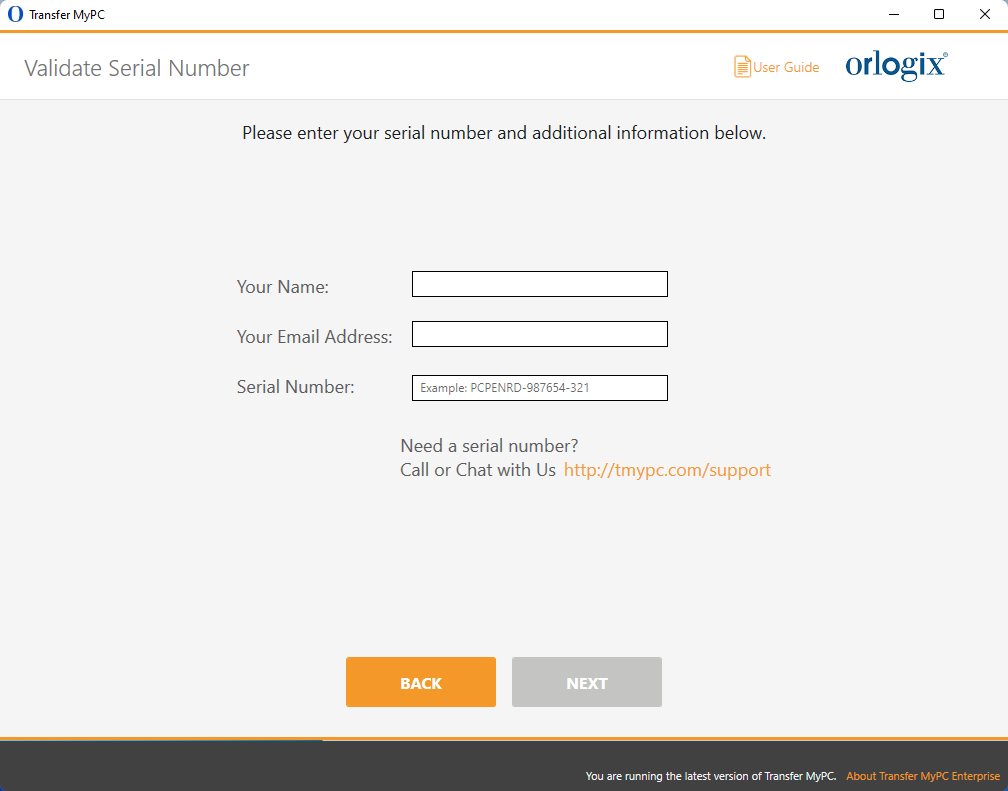
Enter a name, email address, and Transfer MyPC Enterprise Edition serial number, and click Next. Orlogix recommends using the name and email associated with the order to simplify possible later queries but any relevant name and email is acceptable.
Note that, despite what the screen says, the serial number is not actually validated and consumed at this stage. No internet connection is required.
If you enter incorrect details, the validation will fail at a later point and this form will be displayed again allowing you to enter correct details and thus proceed with the transfer.
The serial number you enter now will be used automatically in the following steps.
During the Find Other PC step the serial number is used by both PCs to accurately and automatically discover each other over the network. It is therefore important that the same serial number is entered on both PCs.
During the Start Transfer step, after you click the "Transfer" button, in the moment before actually starting the data transfer, the application will connect to the developer Laplink's validation server on the internet and attempt to validate that the serial number is valid and has at least one unused license remaining. If successful, Transfer MyPC will permanently attach it to the pair of OSs and thus consume a single license.
Run Transfer MyPC on Both PCs - Plug in cable
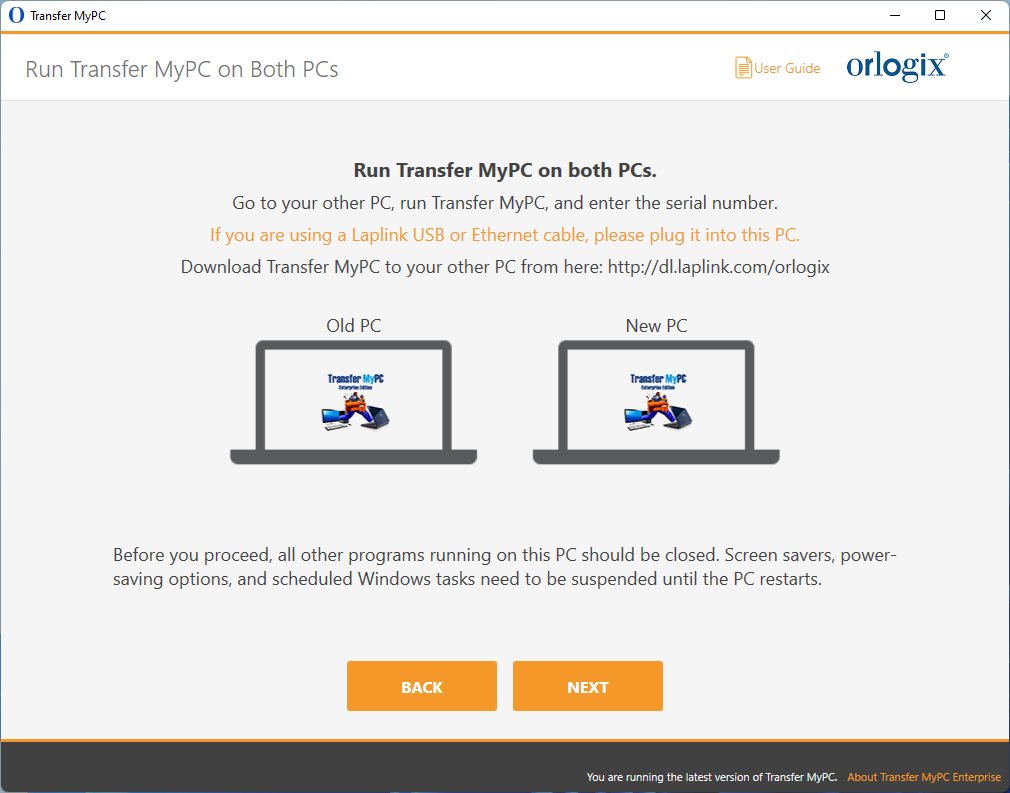
When this screen is visible on both PCs you should use your chosen cable to connect them (if using a cable). If using Wi-Fi please ensure that the Wi-Fi radio's on both PCs are enabled and operating reliably and that the Wi-Fi router is in range. Orlogix recommends using cable connections where possible as the fastest and most reliable method.
If multiple cables are found Transfer MyPC will ask which to use.
Network connections in Transfer MyPC Enterprise Edition are automatically SSL encrypted to allow transport over unsecured networks.
Connection choices
Traditional TCP/IP Network (wired and/or Wi-Fi)
- Both the "Old PC" and "New PC" must be on the same TCP/IP Subnet.
Direct Connection TCP/IP network over Ethernet crossover cable
- Plug the Ethernet crossover cable into the Ethernet ports on both the "Old PC" and "New PC".
Laplink USB Bridge Cable or Thunderbolt Cable
- Plug the Laplink Cable into the applicable USB/Thunderbolt ports on both the "Old PC" and "New PC". Note: If you see the dialog window stating that "Connection with a USB cable cannot be detected", please verify that the cable is plugged in to both PCs.
When the cables are connected or you are otherwise ready, go to the "New PC" only and click "Next" to proceed.
Find Other PC
The "New PC" will automatically attempt to find and connect to the "Old PC" over the available connection.
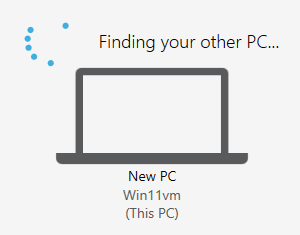
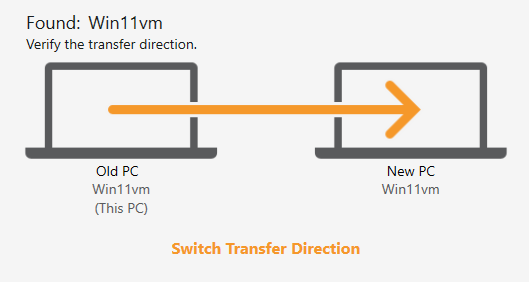
This rarely takes more than a minute if it is successful. When successful the screen will change to say "Found" and the names of both PCs will be shown in the diagram as follows.
If the automatic find and connect process fails please first double-check the physical connector or Wi-Fi and try again by clicking the "Scan again" text link.

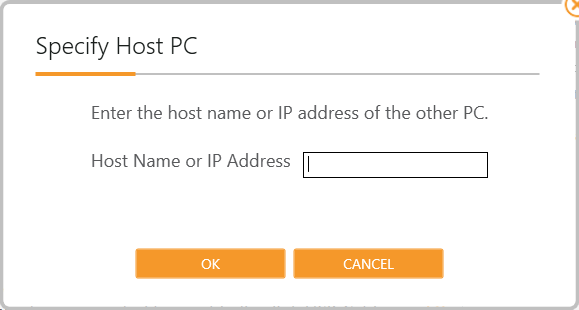
If the automatic find and connect process fails repeatedly you can manually specify the IP address or Windows network hostname of the "Old PC" using a form that appears after clicking the "Specify Other Machine" text link.

If that fails ensure the firewalls on both PCs and any related network equipment is disabled or permitting connections for the Transfer MyPC software (This should happen automatically during setup but Microsoft security uses fuzzy-logic to react to security changes and should thus be considered non-deterministic).
Once the other PC is found and connected, Transfer MyPC attempts to automatically deduct which is the "Old PC" and which is the "New PC".
This information is displayed in the connection diagram (see above). If both PC OSs are similar enough it may make the wrong choice (as it has in the example image above). If that happens simply change it by clicking the "Switch Transfer Direction" text link
 under the connection diagram.
When the connection is established, the "Analyze PC" button will change to orange. Ensure the transfer direction is correct and click "Analyze PC" to proceed.
Analyze PC
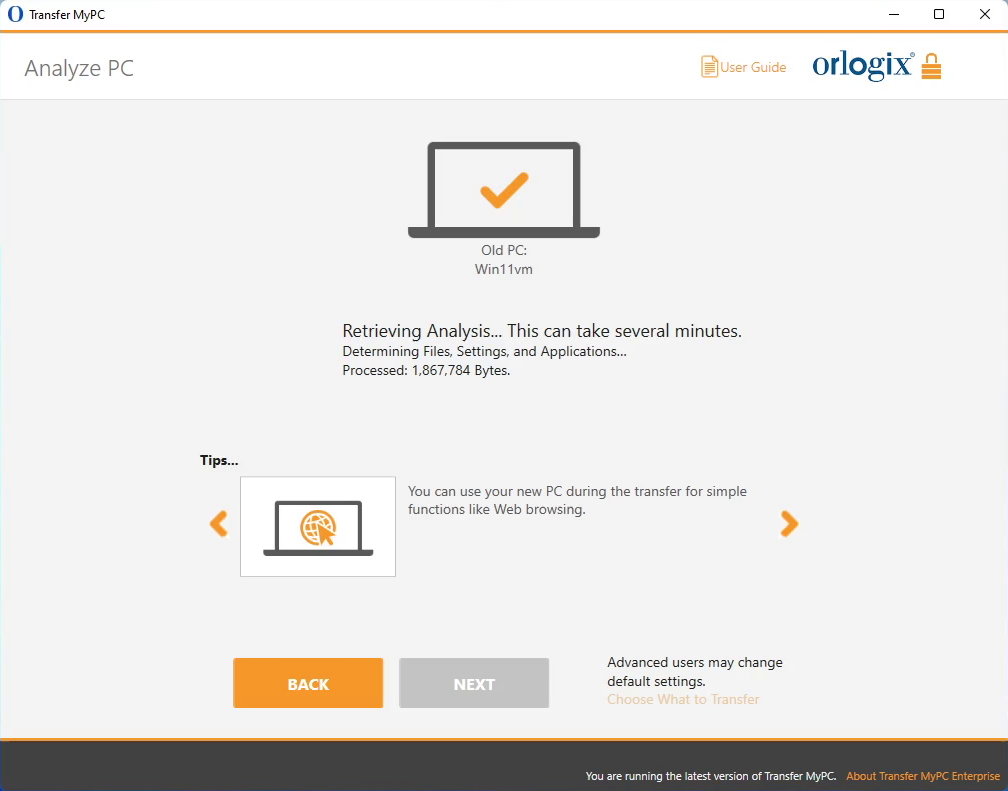
The "New PC" will now automatically analyse the data on the "Old PC" and compare it to the data on the "New PC". This can take several minutes.
When complete, the "Next" button and the "Choose What to Transfer" text link will become available at the bottom of the screen.
- If you click the "Next" button the transfer proceeds to the Transfer Everything step on the assumption that you choose to move all compatible applications, settings and files". You can change your mind about this choice before the transfer starts.
- If you click the "Choose What to Transfer" text link you will move to the Choose What to Transfer screen where you can choose which applications, settings and files to transfer.
Transfer Everything
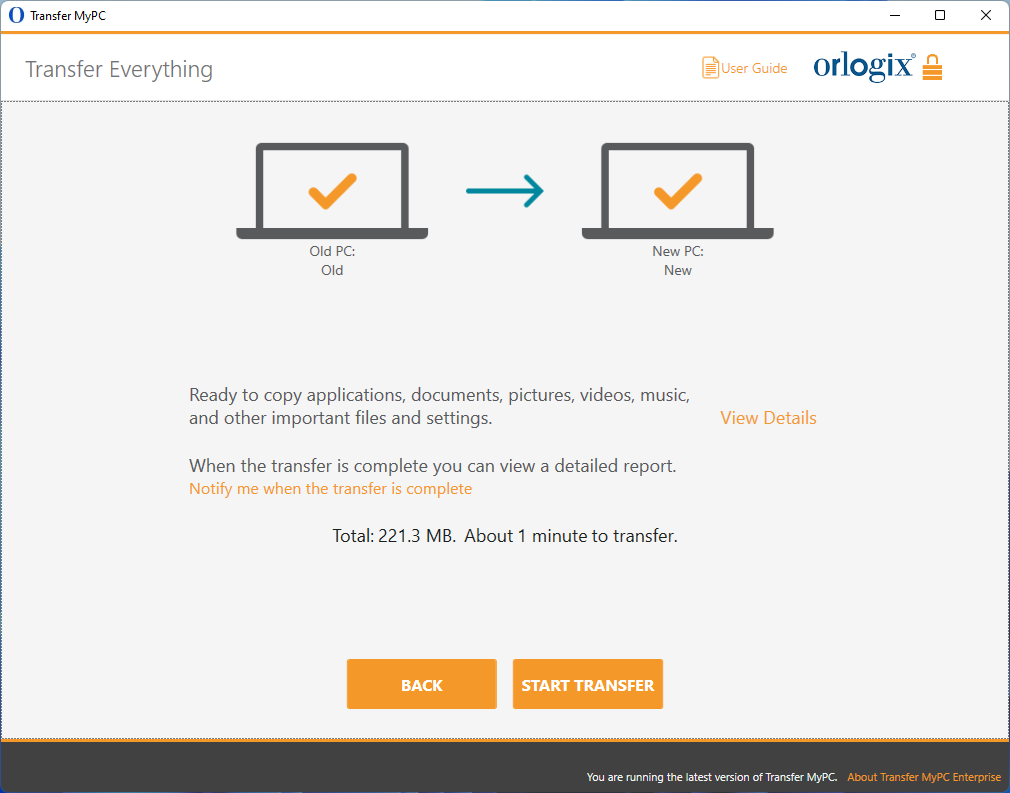
On this screen the transfer changes are calculated. This may take several minutes for large transfers.
When complete, you will see a summary of the estimated size and duration of the transfer.
When complete, you will also see the "Notify me when the transfer is complete" text link. If you click this you can input your email and other details...

...and an email will automatically be sent to you when the transfer is complete. This is useful for very large transfers that may take several hours.
When complete, the "Start Transfer" button and the "View Details" text link will become available.
- If you click the "Start Transfer" button the transfer proceeds to the Start Transfer stage.
- If you click the "View Details" text link you will move to the Let me Choose(aka Transfer Summary) screen where you can change your choice of which applications, settings and files to transfer.
Choose What to Transfer
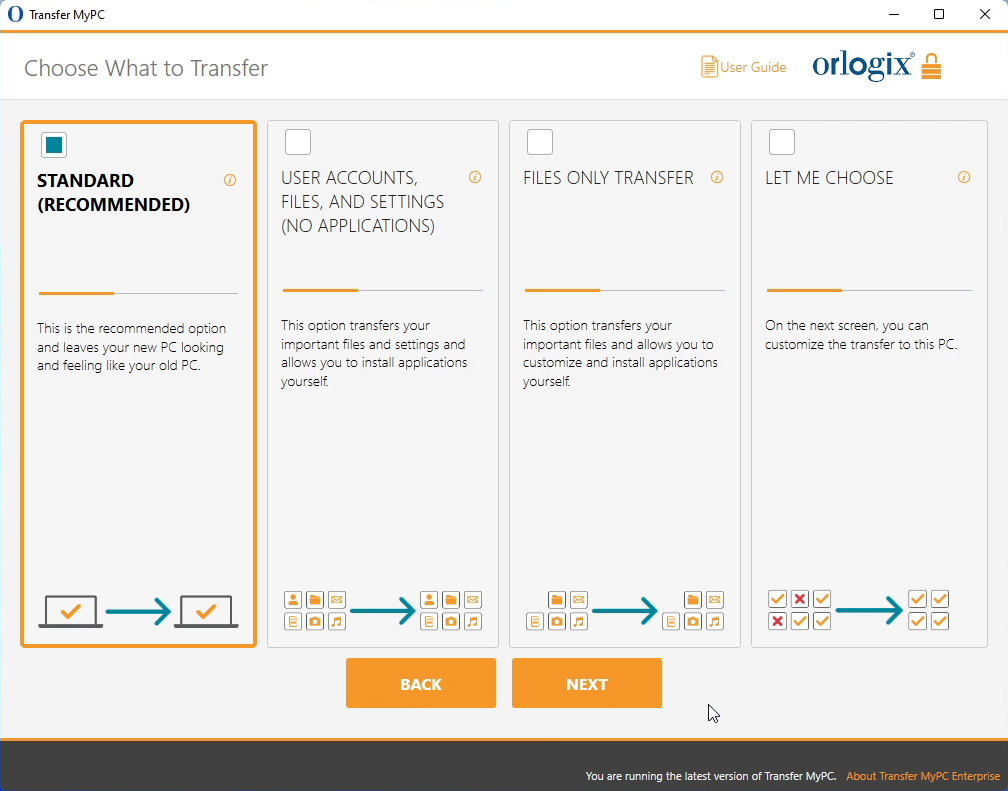
- Standard(Recommended)
- This default recommended choice transfers all compatible applications, settings, files and users.
- User Accounts, Files, and Settings (No Applications)
- This choice transfers only user accounts, files, and settings.
- Files Only Transfer
- This choice transfers only files.
- Let Me Choose (aka "Transfer Summary" screen)
- To choose which individual applications, user accounts, files, and settings to transfer, choose this option. See appendix Let me Choose(aka Transfer Summary) for further details
Click on your choice (the top left box will change to blue) and click the "Next" button to proceed.
Start Transfer - Consume License
After clicking "Start Transfer" the process arrives at this point.
Before the actual transferring of data begins, Transfer MyPC checks the serial number entered earlier to verify it is valid and if so to register it permanently with the current pair of PC OSs and consume a single license attached to that serial number. You must be connected to the Internet, even briefly, at the start of the transfer for this process to succeed.
Serial number invalid
If the validation attempt fails due to the serial number being invalid the Validate Serial Number form will be displayed again for you to enter the correct data.
Failure to connect to validation server
If a connection cannot be made with the validation server for any reason you will see a pop-up window with more
information.
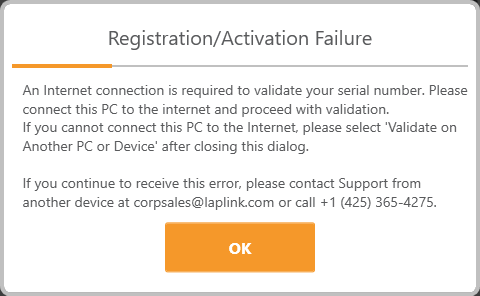
- Click OK and you will be shown the Validate Serial Number form.
- Click the "Validate Using Another PC or Device" text link.

- A screen will appear with the Old Machine (PC) Name and New Machine Name, along with a Session Code.
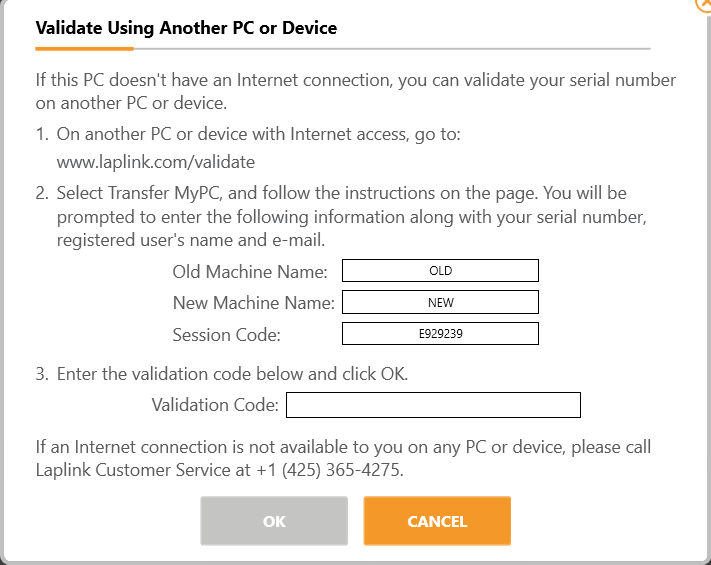
- You will need the Machine Names and Session Code, along with the Transfer MyPC Enterprise Edition Serial Number, in order to obtain the Validation Code, which will be used in place of the serial number to activate the product.
- On another device with Internet access, such as a phone or tablet, go to: www.laplink.com/validate
- Follow the instructions on the page to enter the required information and obtain the "Validation Code".
- Then, enter the "Validation Code" in the "Validate Using Another PC or Device" screen and click OK.
- The serial number is validated and the transfer will now begin.
Transferring
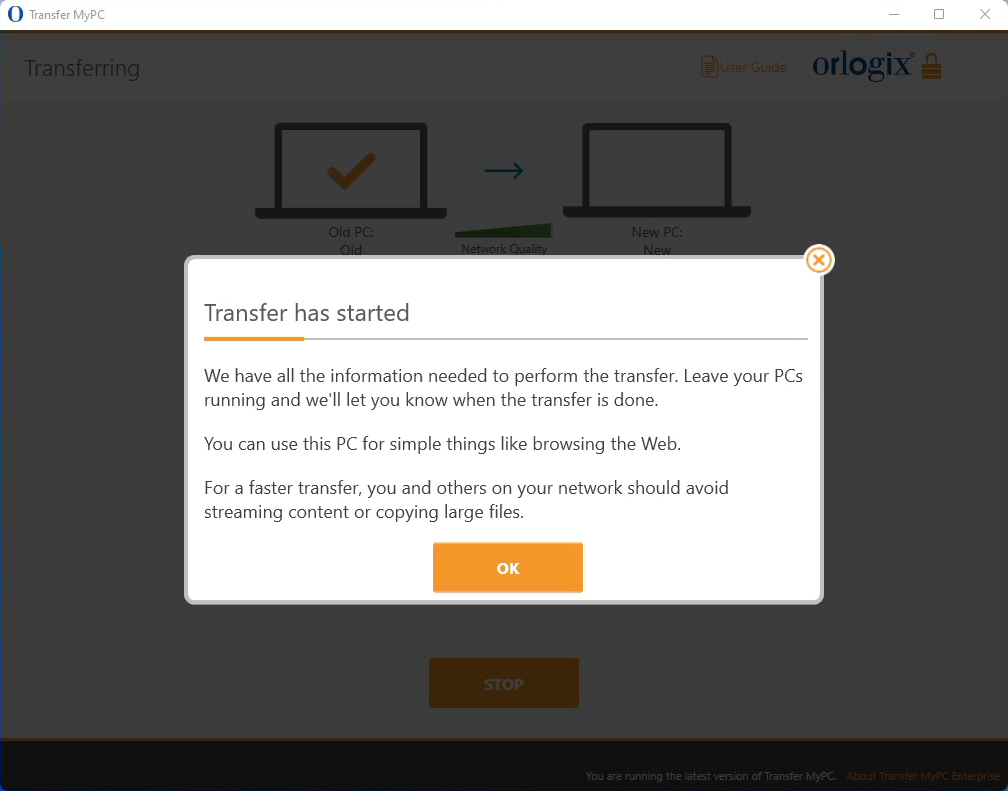
Transfer MyPC Enterprise Edition is now transferring all of the selected applications, data files and registry settings to the "New PC". Click OK and allow the transfer to complete.
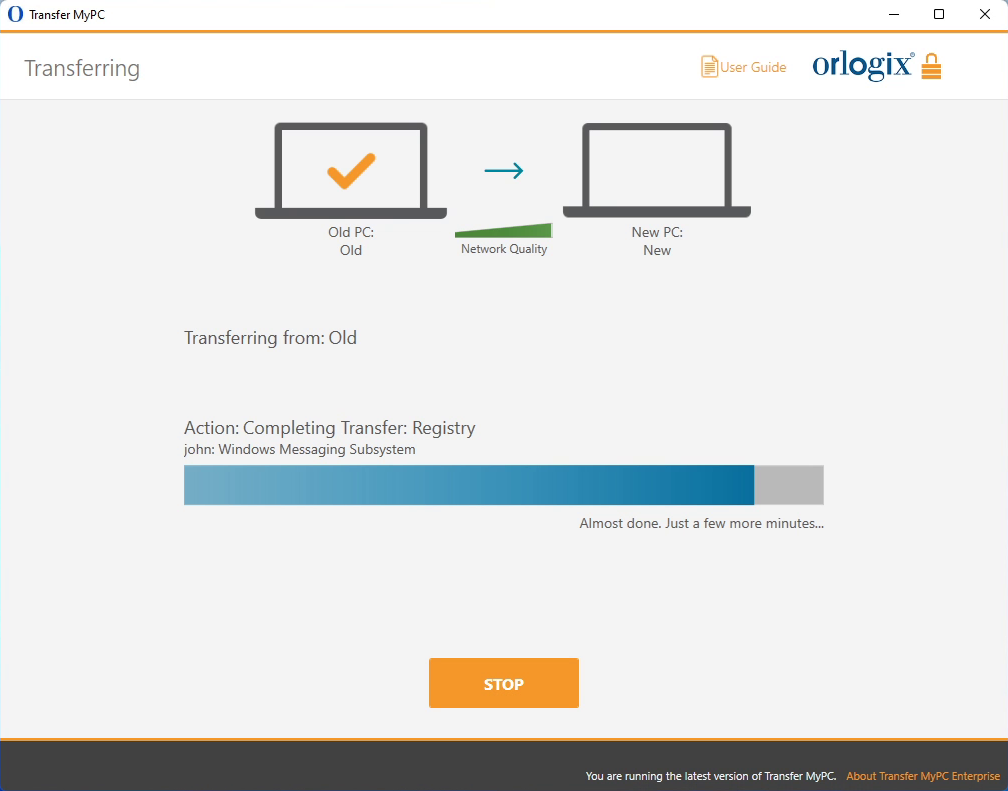
The length of time required to perform the transfer depends on the configuration of the computers and the amount of data to be transferred, and could be as much as several hours or more.
Note: On very rare occasions the transfer of data will not continue; if you do not see any progress for more than an hour, you should restart the transfer.
Transfer Complete
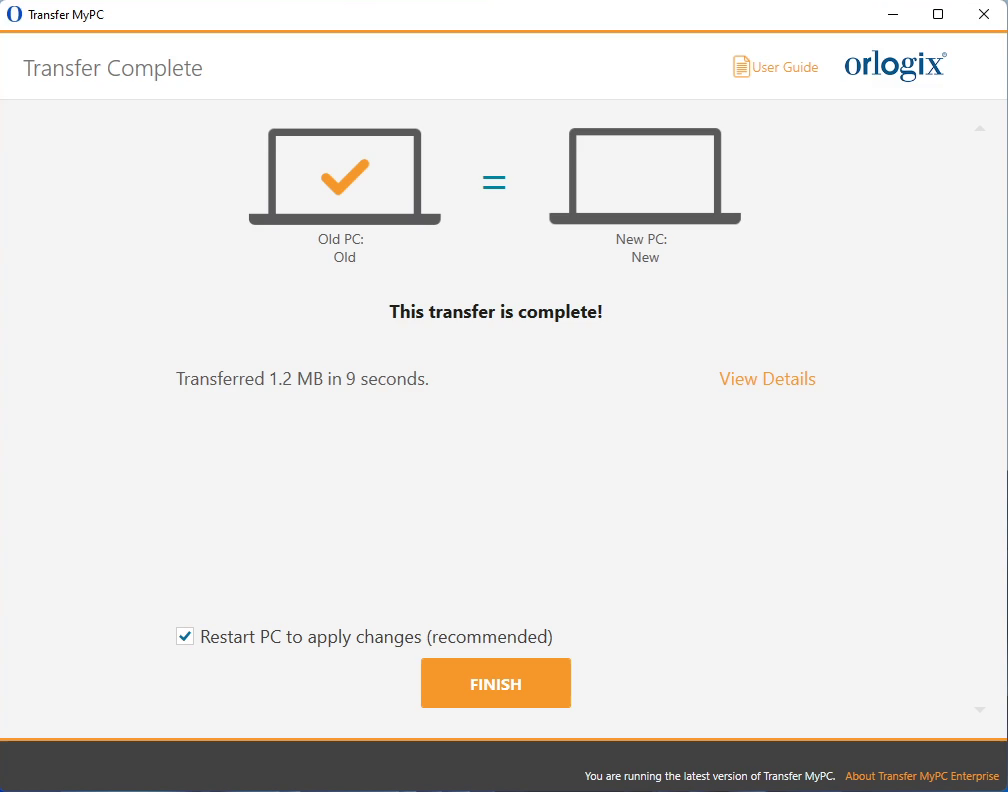
The transfer to the "New PC" is now complete.
At this point, if you used a direct PC to PC cable connection for the transfer you should unplug the cable from both PCs and reconnect the LAN network cable if applicable.
Internet connectivity is required so Transfer MyPC Enterprise Edition can install Microsoft Redistributable packages that may be required by some of the applications.
You will need to restart the "New PC" for all of the settings to take effect. Click Finish to restart automatically.
Technical Support
Enterprise Support
Unlimited free email support from enterprise.support@orlogix.com
Email support is only availble in English.
Consumer and Business Support
Unlimited free email support from support@orlogix.com
Unlimited free phone support from
European Freephone : 00800 3883 2000
ROI number : +353 61 226 935
Times of Operation
Monday - Friday
(Republic of Ireland public holidays excepted)
Please note that we are also closed on Dec 24th
08:00 - 13:00 open
13:00 - 14:00 closed
14:00 - 16:00 open
14:00 - 15:00 open(Fridays only)
Republic of Ireland Time Zones used
During "Irish Winter Time"
from last Sunday in Oct to last Sunday in Mar
WET/GMT (UTC+0)
and
During "Irish Standard Time"
WEST/BST/IST (UTC+1)
Email and Telephone support is available in English, German, French, Italian and Spanish.
Customer Feedback
We welcome all feedback to john@orlogix.com
FAQs
Support Solutions
Welcome Screen, Unable to Advance
If the Next button stays gray and you see an error, please follow these steps:
- Close the "Transfer MyPC" application.
- Open Windows Task Manager: Press the "Windows Key + X" and then press "T".
- In Task Manager, expand your view if needed, and click the Services tab.
- Locate "Transfer MyPCService" or "PCmoverService" in the list, right-click on it and click Restart.
- Close Task Manager.
- Start the "Transfer MyPC" application.
Registration / Activation Failure, No Internet Access
You must be connected to the Internet for Transfer MyPC Enterprise Edition to validate the serial number and start the transfer.
Failure to connect to validation server
If a connection cannot be made with the validation server for any reason you will see a pop-up window with more
information.
- Click OK and you will be shown the Validate Serial Number form.
- Click the "Validate Using Another PC or Device" text link.
- A screen will appear with the Old Machine (PC) Name and New Machine Name, along with a Session Code.
- You will need the Machine Names and Session Code, along with the Transfer MyPC Enterprise Edition Serial Number, in order to obtain the Validation Code, which will be used in place of the serial number to activate the product.
- On another device with Internet access, such as a phone or tablet, go to: www.laplink.com/validate
- Follow the instructions on the page to enter the required information and obtain the "Validation Code".
- Then, enter the "Validation Code" in the "Validate Using Another PC or Device" screen and click OK.
- The serial number is validated and the transfer will now begin.
"New PC" not listed when using a direct PC to PC cable connection
Once you have reached the Find Other PC screen on the "OLD PC" when using an ethernet crossover cable or Laplink USB/Thunderbolt cable method of transfer, the "New PC"s name should be listed on the screen.
If you do not see the "New PC" listed, first make sure that the cable is plugged into both computers, connecting the "Old PC" and "New PC".
Then, wait for the connection between PCs to be established. If connection has not occurred after 60 seconds, click "Scan Again". Select the "New PC" from the list if shown and click OK.
If the "New PC" isn't listed after clicking "Scan Again", click "Cancel" on both PCs to exit Transfer MyPC Enterprise Edition. Verify the cable is plugged into both PCs and restart Transfer MyPC Enterprise Edition.
Undoing a Transfer
Transfer MyPC Enterprise Edition allows you to restore the "New PC" to its original state before the transfer. If you wish to undo the transfer, please start Transfer MyPC Enterprise Edition on the "New PC" and follow the screens.
- Welcome to Transfer MyPC Enterprise Edition. Click Undo Transfer and click Next.
- Undo. Follow the wizard screens to finish the Undo process.
Appendices
Let me Choose(aka Transfer Summary)
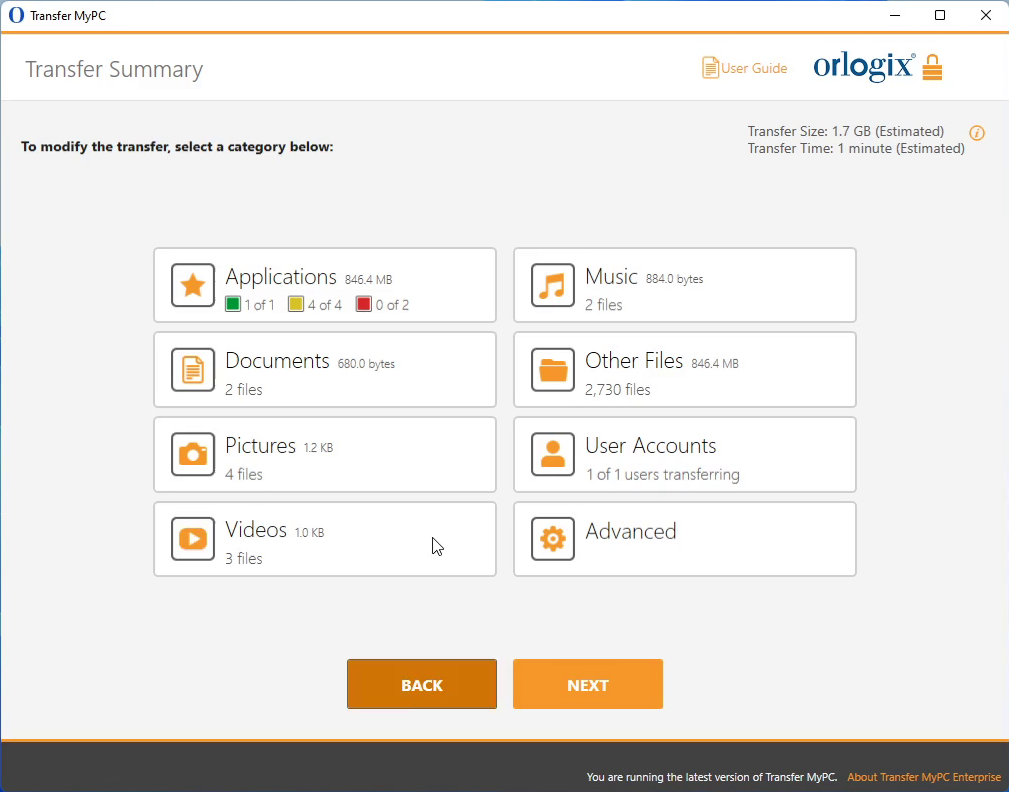
Select an item you wish to customize. Once finished with an item, you will return to this screen. Click Next when finished customizing the transfer.
- Applications
- All applications that can be transferred are selected by default. If desired, you may deselect specific applications that you don't want transferred to the "New PC". See Applications for further instructions.
- Documents / Pictures / Videos / Music / Other Files
- On each screen, all folders with files in each category are selected by default. Deselect any folders you don"t want transferred. See Documents / Pictures / Videos / Music / Other Files for further instructions.
- User Accounts
- You may review and edit the settings for how user accounts will be transferred. See Users for further instructions.
- Advanced
- You may review and edit settings for how drives and certain file types are transferred. Other custom changes can also be made to the transfer settings if needed (advanced users only). See Advanced for further instructions.
Applications
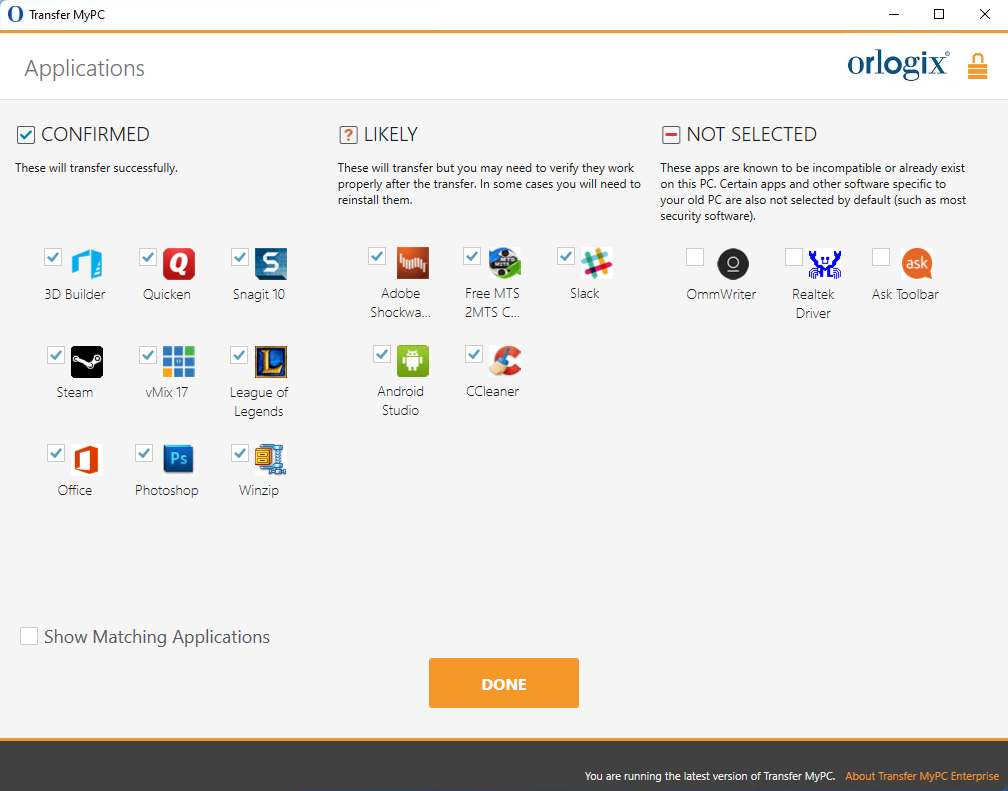
List of Applications: On this screen is a list of the applications on the old computer. All applications that are likely to transfer successfully are selected by default to transfer to the "New PC". You may deselect any applications that you do not wish to have transferred. Click Done when finished. Any applications not selected by Transfer MyPC Enterprise Edition are not likely to transfer successfully and should not be selected. See list below for applications and programs you should not transfer.
Do not transfer:
- Applications incompatible with the operating system on the "New PC". Occasionally this may occur when transferring from an older operating system to a newer operating system, or when transferring from a 32-bit OS to a 64-bit OS.
- Applications already installed on the "New PC".
- Applications with a trial version installed on one PC and the full version on the other PC. IMPORTANT: Trial versions of applications should always be uninstalled from the "New PC" before transferring a full version of the application from the "Old PC".
- System tools, such as virus scanners, spyware detectors, firewall software, and desktop search utilities, which are unlikely to transfer correctly.
Documents / Pictures / Videos / Music / Other Files
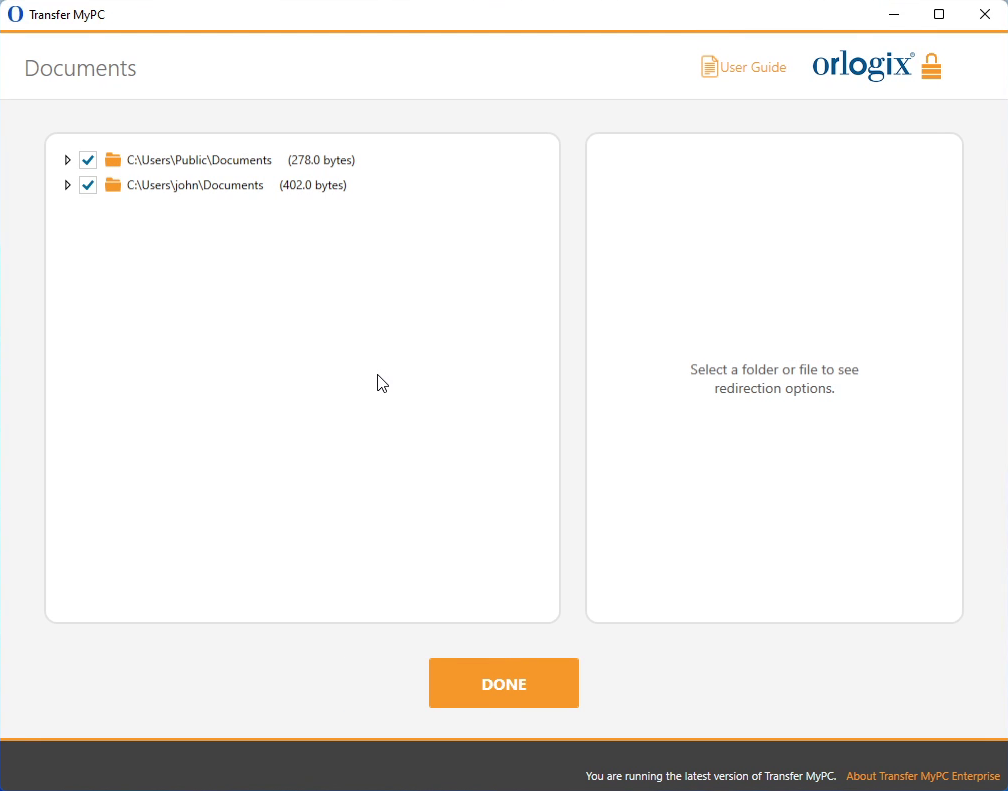
For each file type, Transfer MyPC Enterprise Edition allows you to deselect and exclude specific folders from the transfer. If, for instance, you do not want to transfer specific folders containing Documents, you can deselect those folders on the Documents screen, and they will not transfer to the "New PC". You cannot exclude specific files, but you can exclude specific folders.
All folders that remain selected on each screen will transfer to the "New PC".
Click Done on each screen when you have finished deselecting folders.
Note: To change the transfer destination for a folder, select the folder that you want to transfer to a different location. On the right side of the screen, the "Path" text field will show the location of the folder on the "Old PC", and the "Target" will show the current default transfer destination on the "New PC". Enter a new transfer destination in the "Target" text field as needed. Leave the "Path" text field as is.
User Accounts
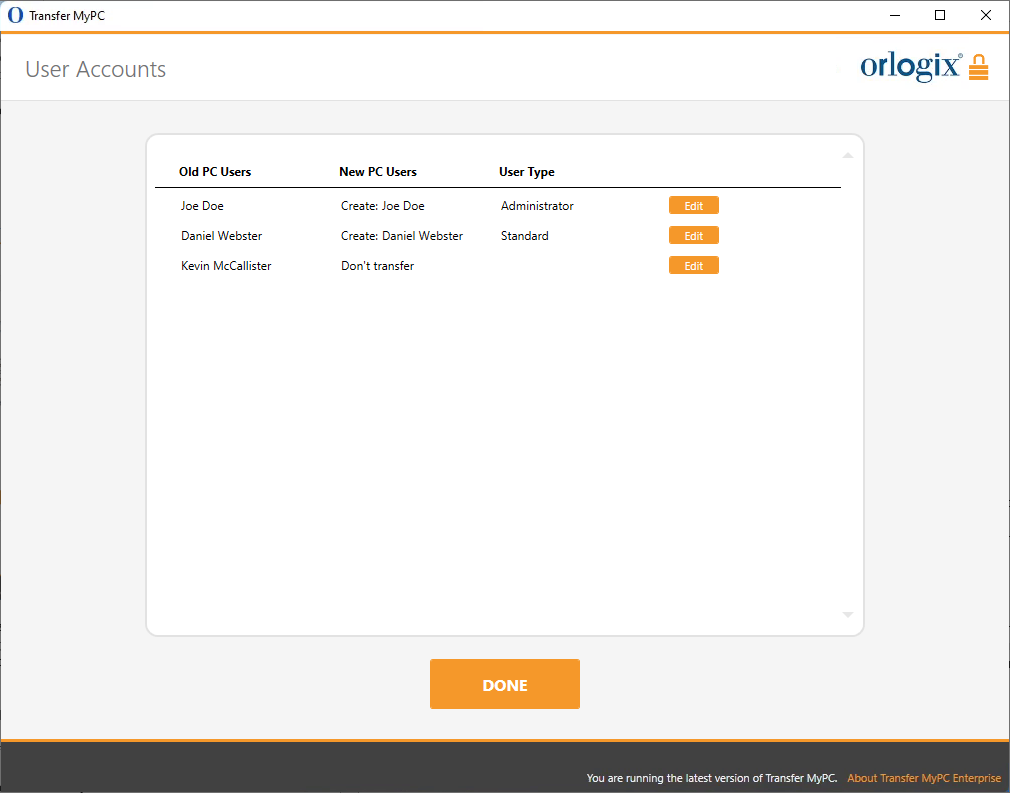
The settings and associated files for the users on the "Old PC" will be transferred to the user accounts on the "New PC" as shown in the list. If you have already established settings for the users on the "New PC" prior to the transfer, these settings will remain the same and will not be overwritten by the transfer. The user names and passwords for the users on the "New PC" will also remain the same.
To transfer all users to the "New PC" as listed, click Done.
To modify how a user is transferred to the "New PC", select the user in the list and click Edit. In the dialog box that appears, you may choose to transfer to a different user on the "New PC", or you may create a new user on the "New PC". You may also choose to not transfer the user at all. Click OK when finished, and then click Done.
Advanced
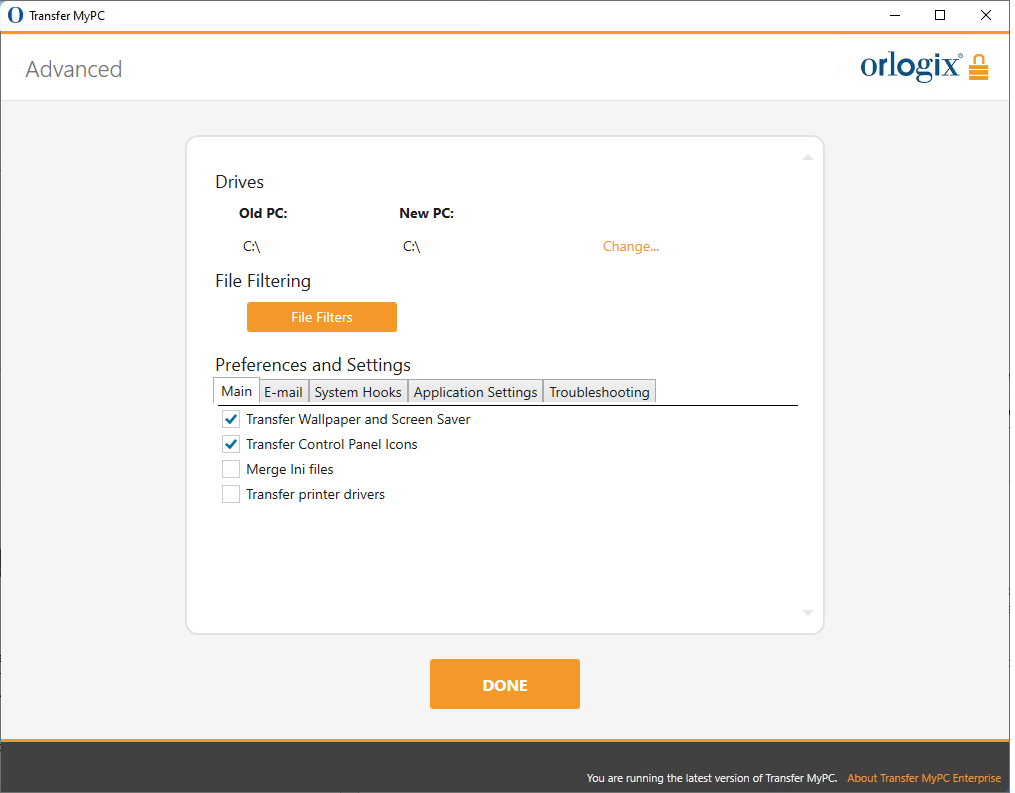
Drives: If the "Old PC" contains more disk drives than the "New PC", Transfer MyPC Enterprise Edition will create a folder for each drive that does not exist on the "New PC".
To modify how a drive is transferred to the "New PC", click Change. In the dialog box that appears, you may modify the drive and/or default folder to which the drive from the "Old PC" is transferred. You may also choose to not transfer the drive from the "Old PC". Click OK when finished, and then click Done.
File Filtering: To exclude certain file types from the transfer, click File Filters.
Some file types are already set up for you in this screen, such as temporary files (.tmp). These files are generally small, but if you have a large number, they can take up quite a bit of hard drive space. To exclude any of these file types, select the check box(es).
To exclude other file types not shown on this screen, click Add and type the file type extension(s) of the file(s) you wish to exclude. For instance, if you want to exclude all files in .jpg format, this is where you list "*.jpg". Click Done when finished listing file types.
Preferences and Settings: Other custom changes can be made to the transfer settings if needed. Only advanced users should modify selections in this section.
Click Done when finished making changes on the Advanced screen.